
BC PST Returns
Zoho Books helps you in filing and recording your BC PST returns for your business based out of Canada. BC PST Return report is generated with respect to the lines that are given in the Revenue Division - Ministry of Finance’s BC PST return filing form
Configure Tax Returns
To configure BC PST tax return settings in Zoho Books:
- Go to Settings.
- Select Taxes under Taxes & Compliance.
- Select Tax Return Settings on the left sidebar.
- Click + New Tax Return Settings.
- In the New Tax Return Settings page, fill in the following details:
- Jurisdiction Tax/State: Select British Columbia from the dropdown.
- Reporting Period: Select the reporting period as Monthly, Quarterly, or Yearly.
- Tax Fiscal Year: Select the fiscal year for which you want to generate the tax return.
- Tax Return Start Date: Set the date from which your first BC PST return should be generated.
- Report Basis: Choose either Accrual or Cash as the tax basis.
- Click Save.
Your BC PST tax return settings are now configured.
Generate Tax Return
After configuring your BC PST tax return settings, you can generate a return directly from Filing & Compliance. Here’s how:
- Go to Filing & Compliance on the left sidebar, and select BC PST Returns.
- Click Generate BC PST Returns.
Your tax return will be generated and listed on the BC PST Returns page.
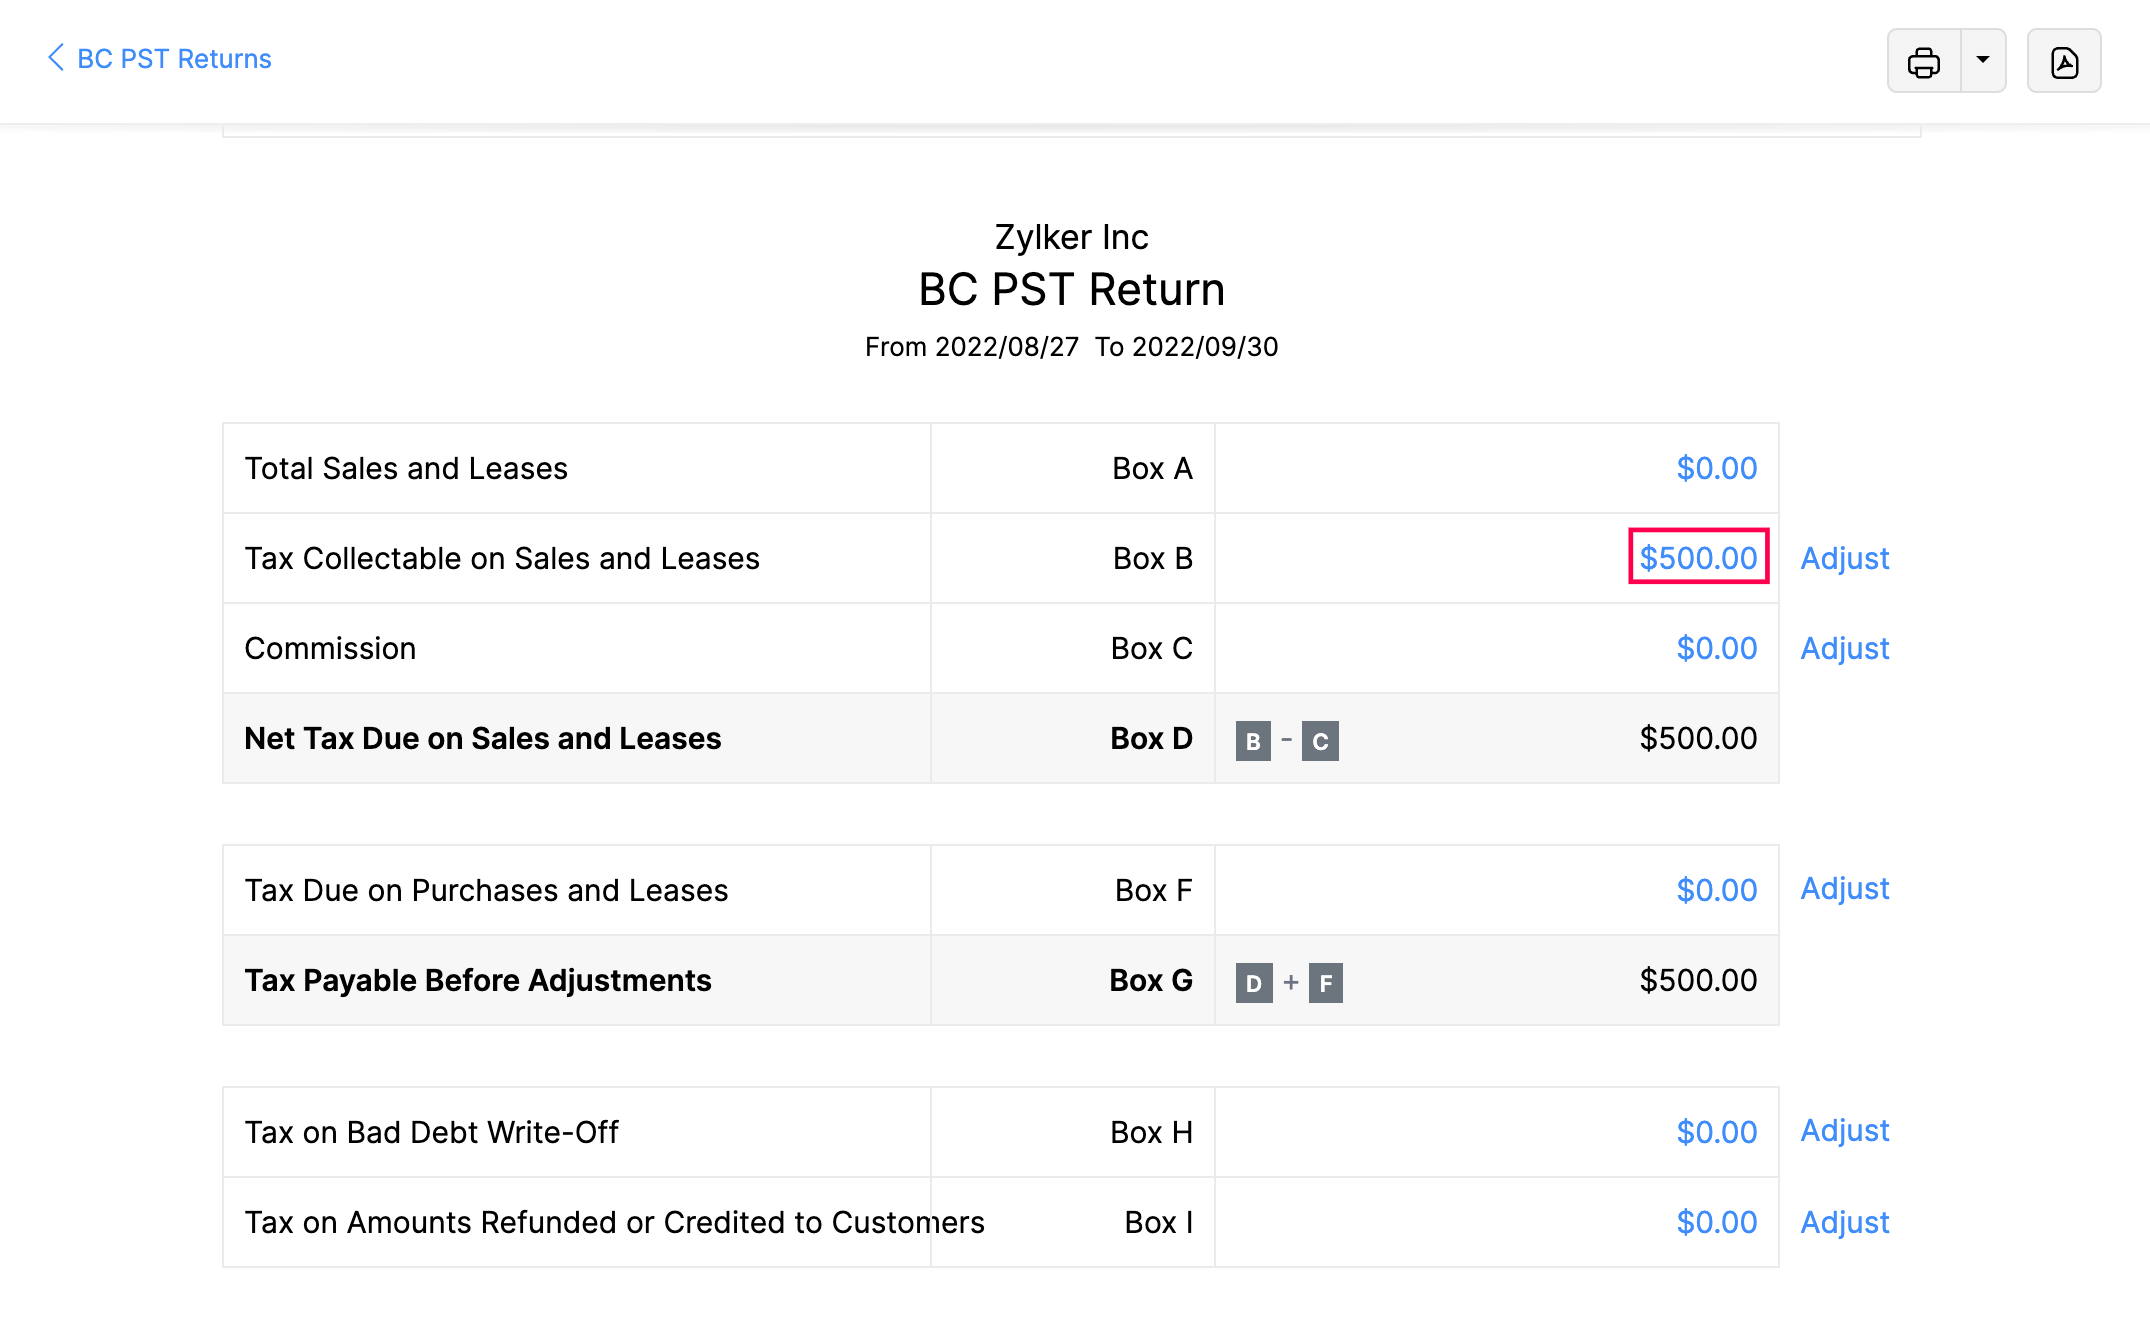
Tax Return Details
Click the numbers in the boxes to see detailed information for each entry. This lets you dive deeper into the data shown in the lines.
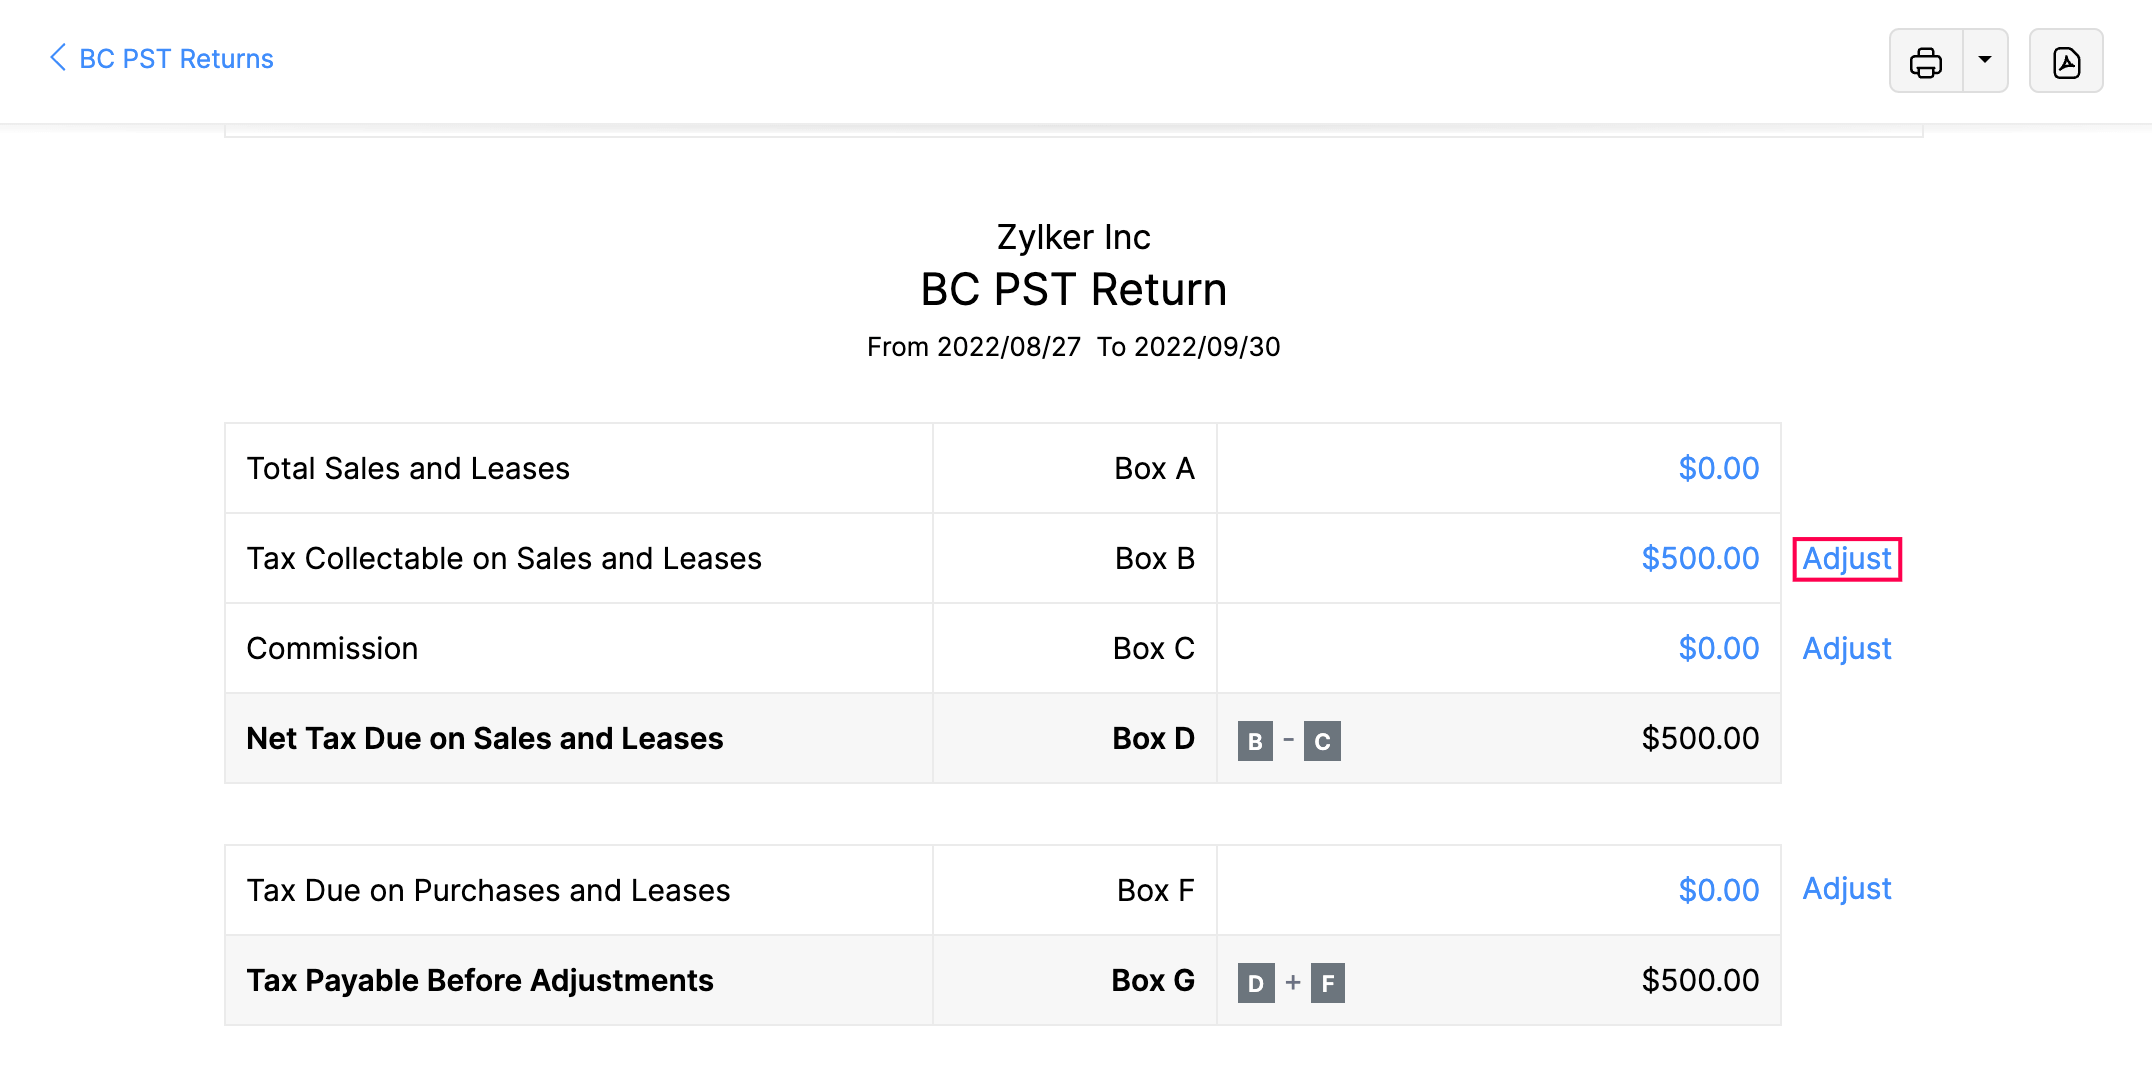
Adjustments in BC PST Tax Returns
The BC PST returns allows you to record adjustments in the corresponding lines of your tax return. Here’s how:
- Go to Filing & Compliance on the left sidebar, and select BC PST Returns.
- Select the tax return for which you want to make adjustments.
- In the following page, click Adjust for the tax you want to make adjustments for.
- In the pop-up, fill in the following fields:
- Date: Choose the date when the adjustment was recorded. The current date is selected by default.
- Reference#: Enter the reference number if applicable.
- Amount: Enter the adjustment amount.
- Account: Select an account where this adjustment will be recorded.
- Reason: Enter the reason for recording this adjustment.
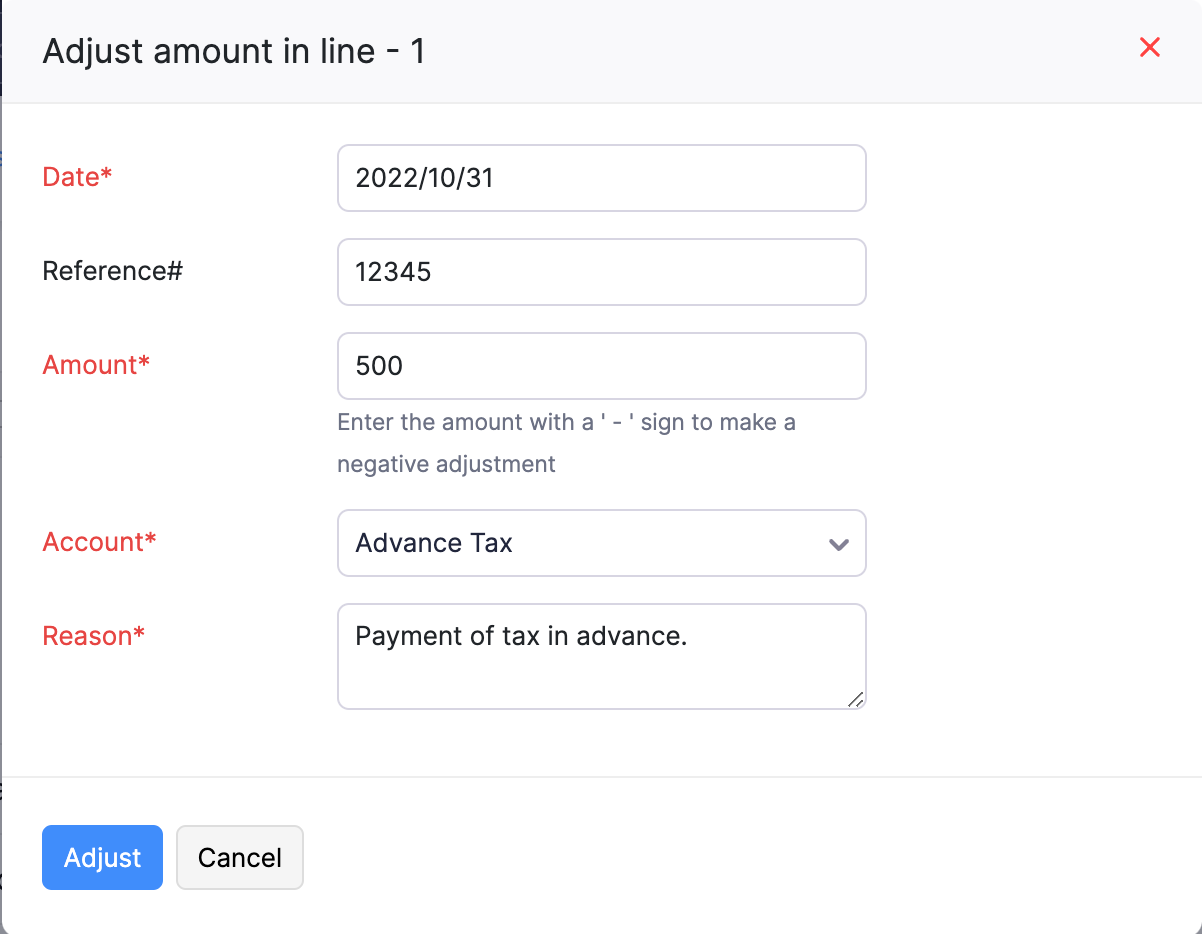
- Click Adjust.
Now, the amount in the tax return will be adjusted accordingly.
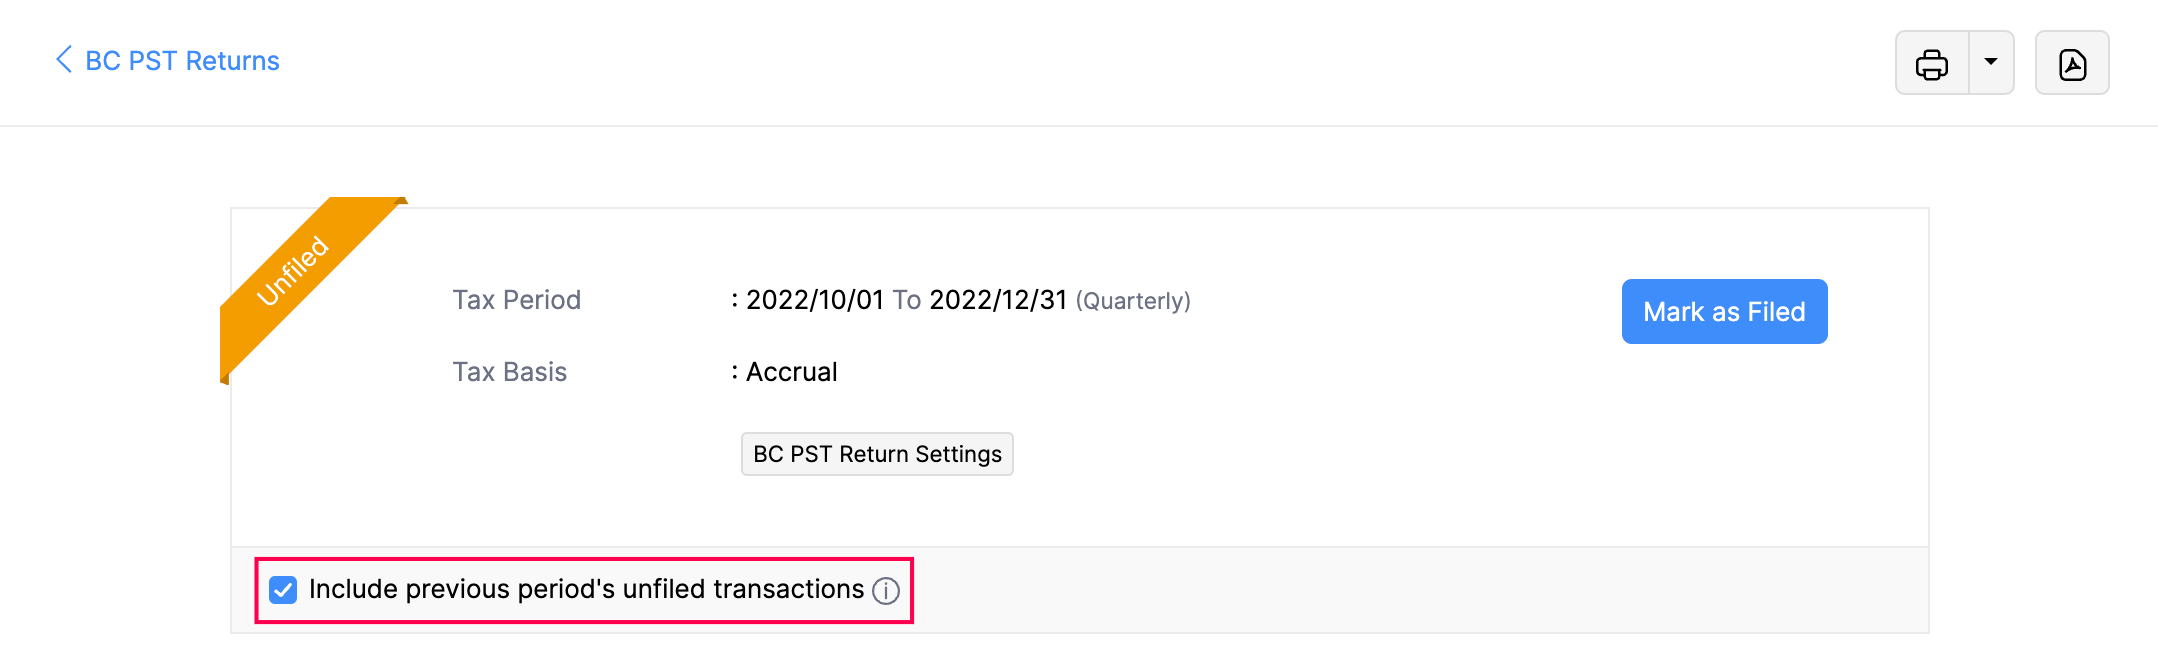
Include Previous Transactions
Sometimes, you may need to record a transaction for a previous BC PST return period, even if that return has already been filed. You can do this by recording the transaction with the previous date and including it in your current BC PST return.
To include unfiled transactions from a previous period:
- Go to Filing & Compliance on the left sidebar, and select BC PST Returns.
- Click the unfiled tax return.
- In the return detail page, check the option Include unfiled transactions.
Any unfiled transactions from previous tax periods will be included in this tax return.
View BC PST Returns
To view returns:
- Go to Filing & Compliance on the left sidebar, and select BC PST Returns.
The BC PST Returns page displays two tabs — Unfiled BC PST Returns and All Filings — so you can quickly view returns by their filing status. The Status column shows whether a return has been filed, and the Balance Due column indicates the amount you need to pay or claim for each return.
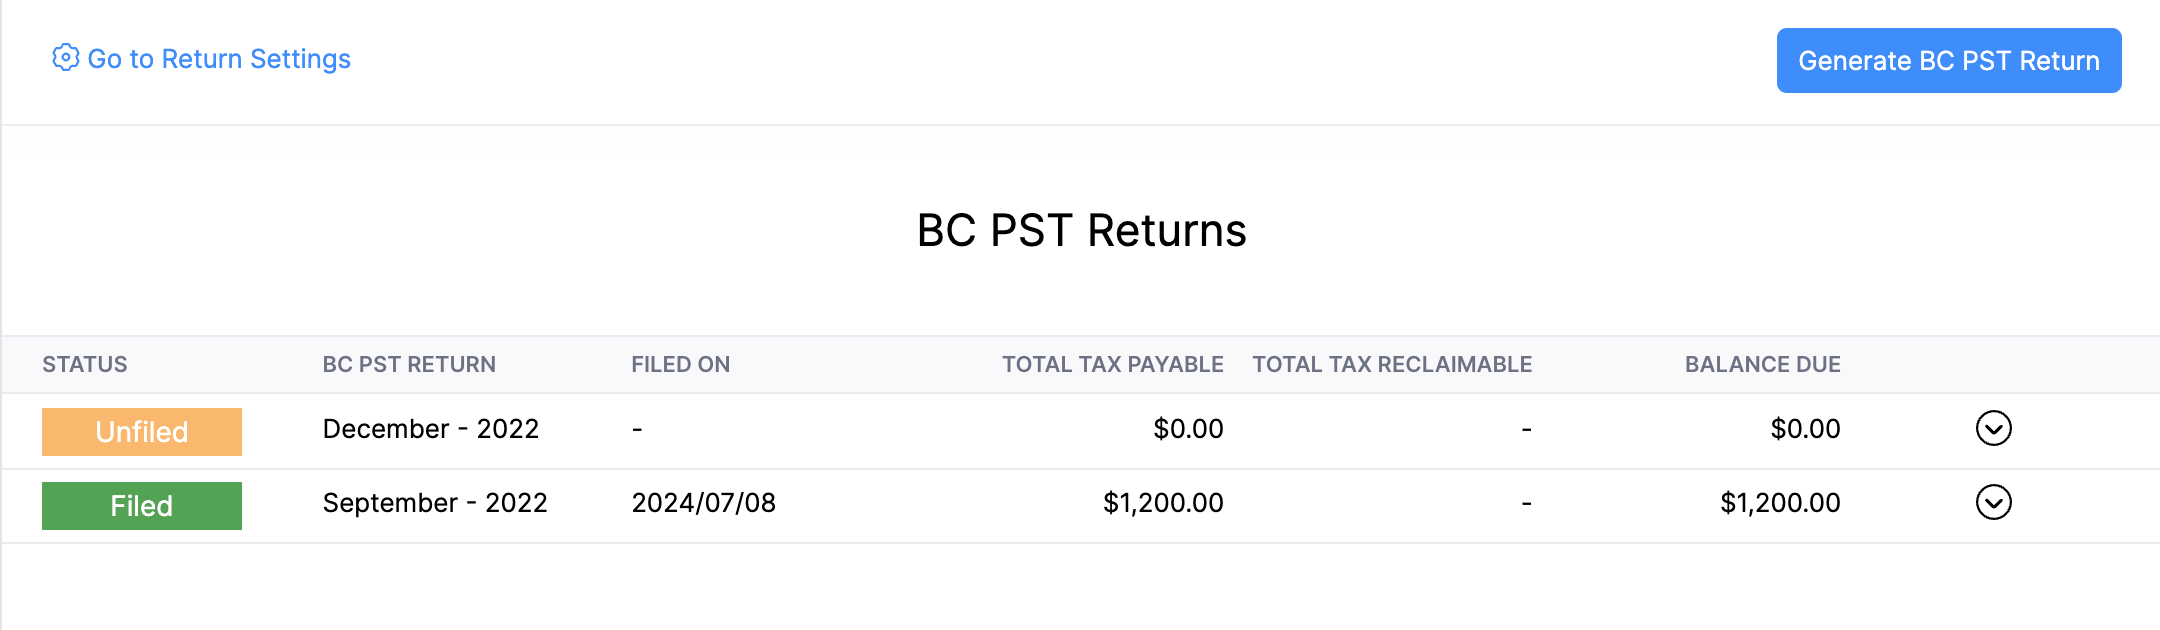
Note: You can only generate a new BC PST return after filing the previous return.
Delete BC PST Return
To delete a return:
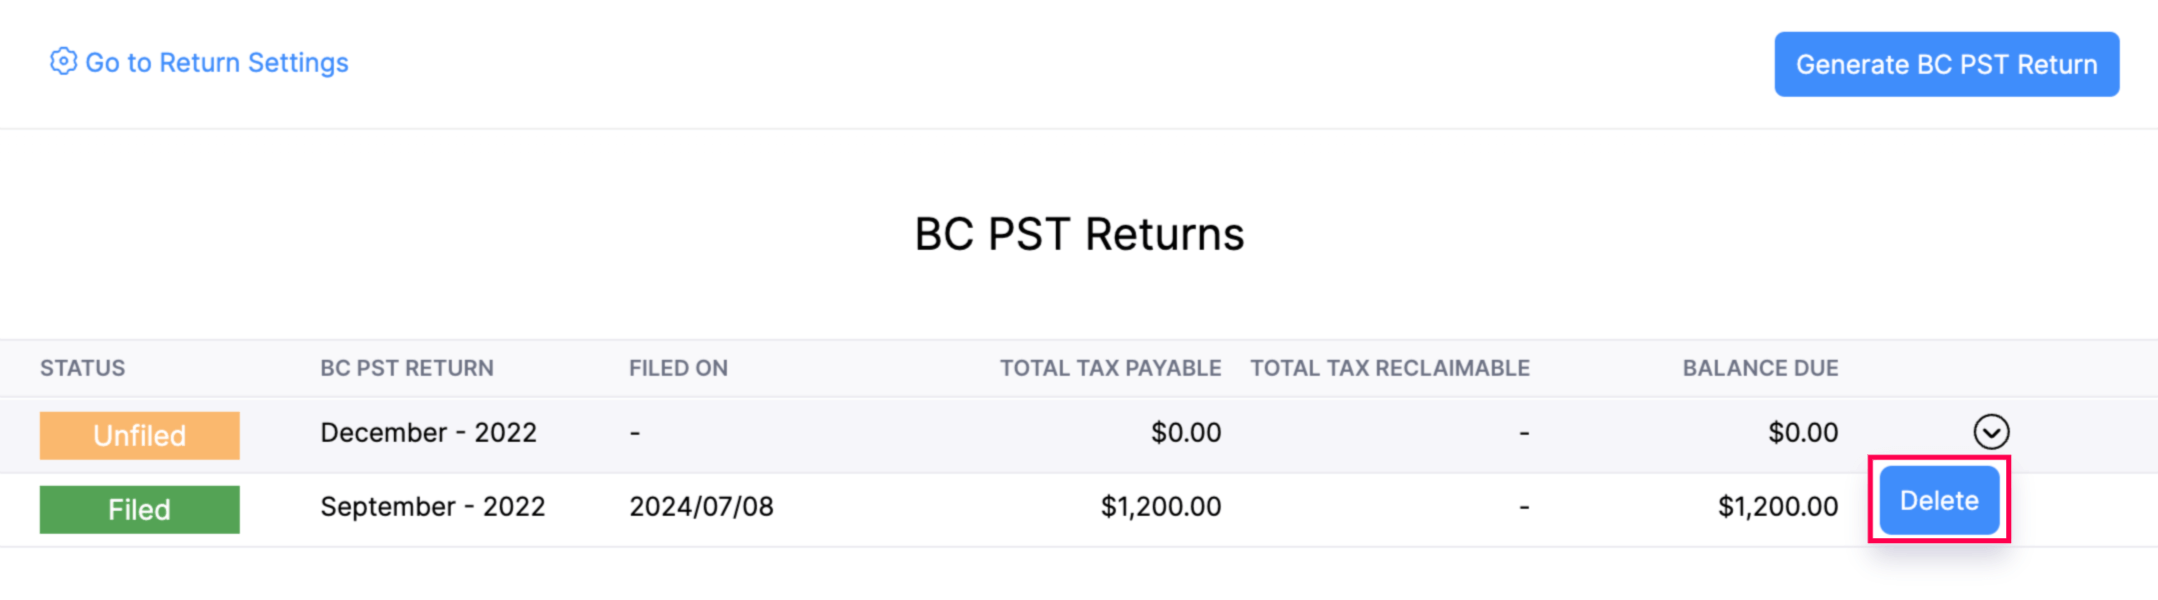
- Go to Filing & Compliance on the left sidebar, and select BC PST Returns.
- Click the dropdown next to the tax return you want to delete, and select Delete.
Mark BC PST Return as Filed
Warnings:
- Once marked, the transactions for the current tax period cannot be edited.
- Tax Return cannot be filed before the end of the reporting period
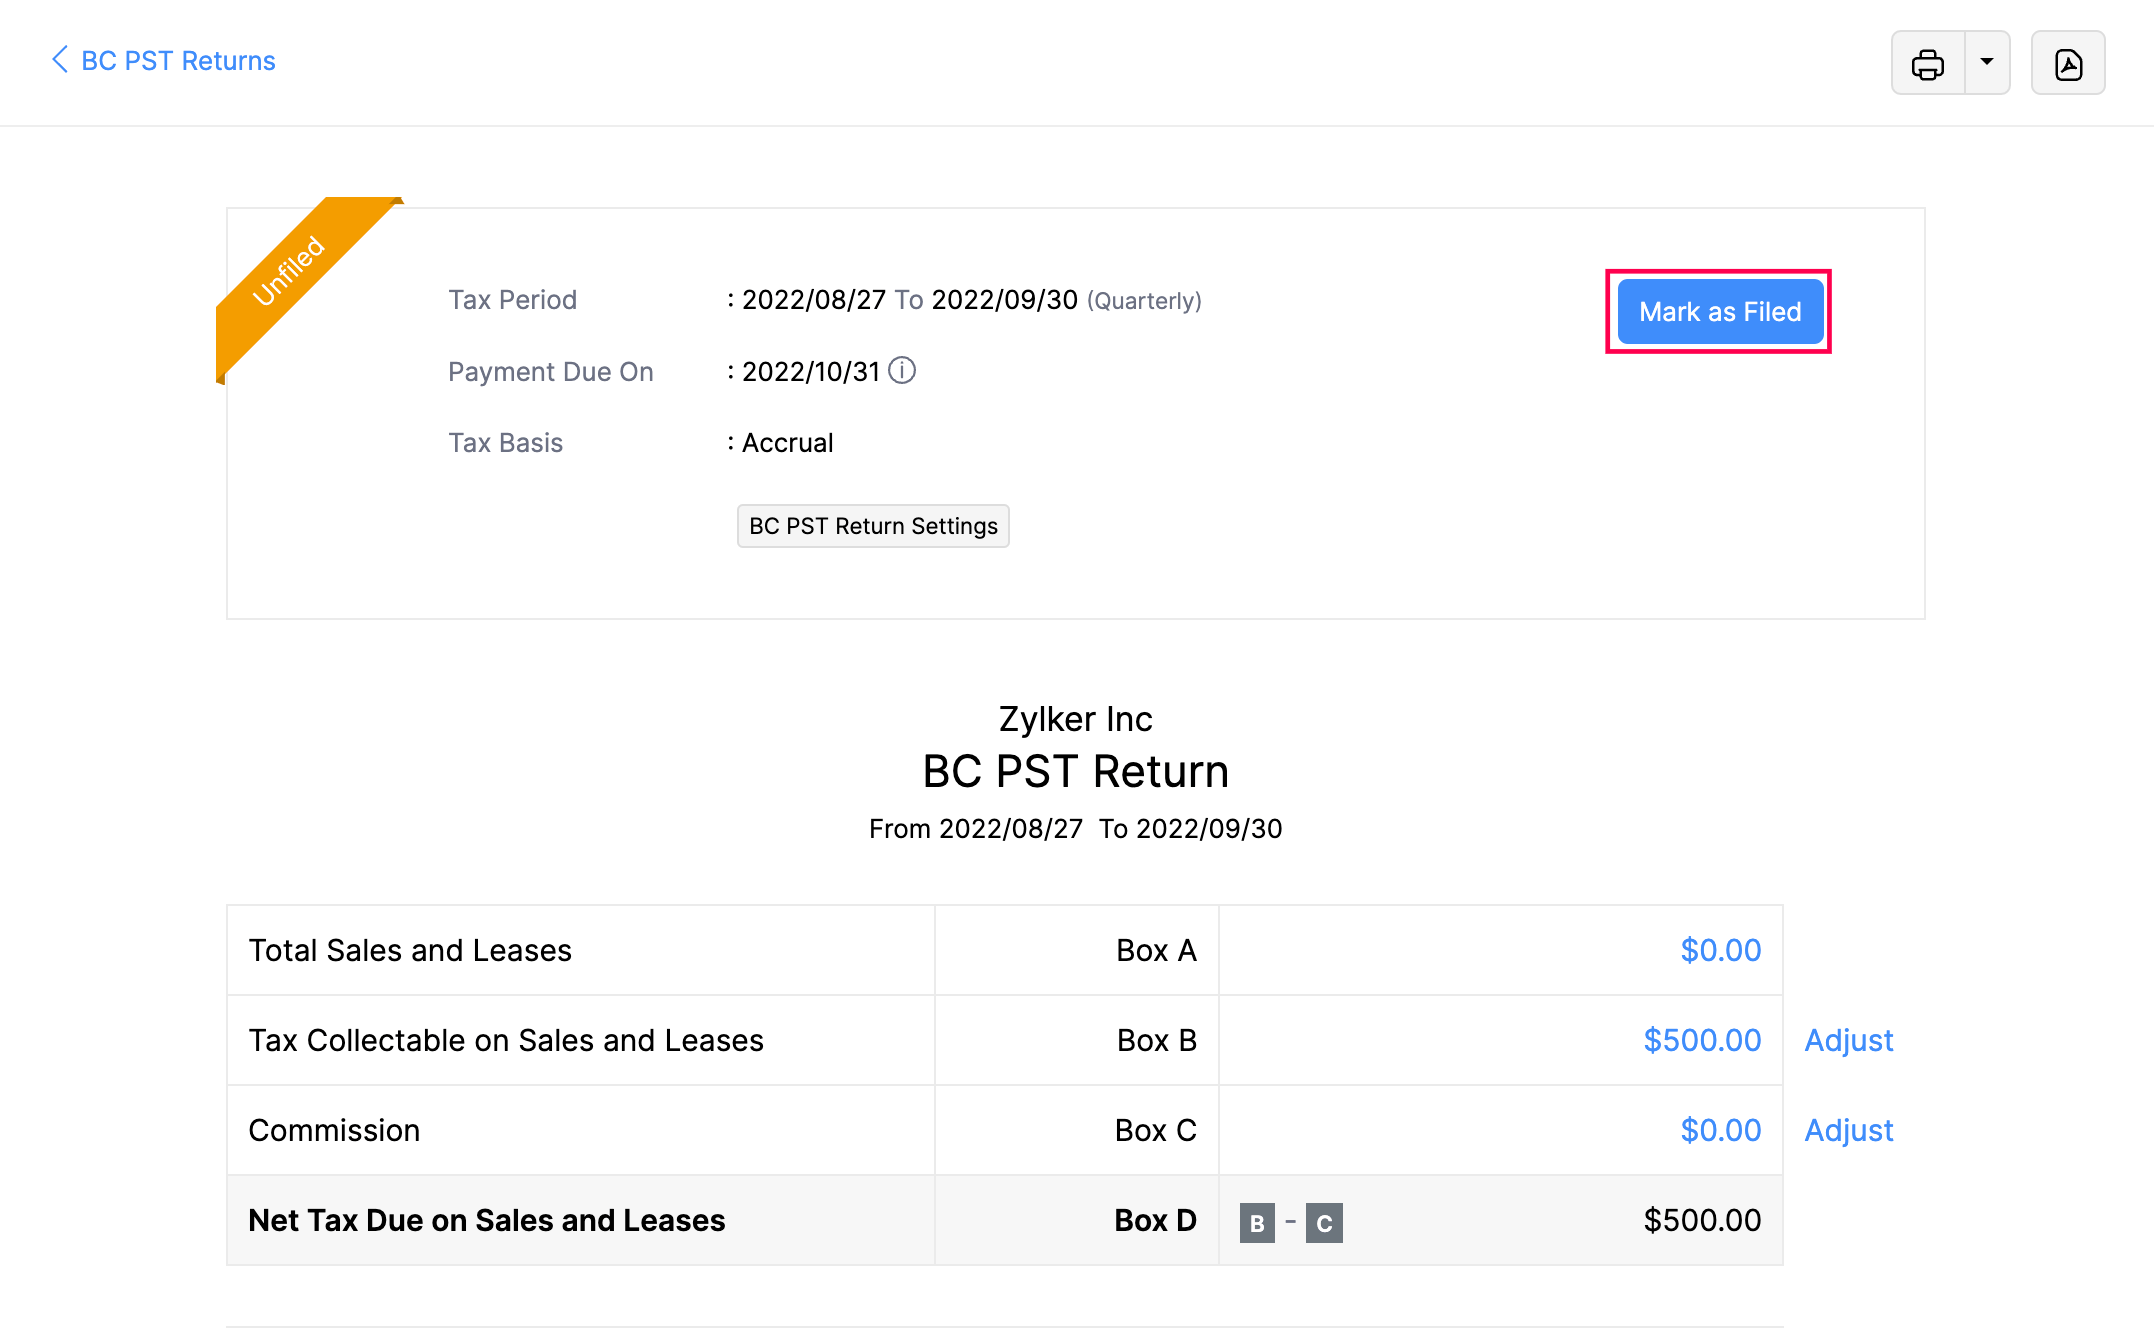
After filing your tax returns with the tax agency you can mark your BC PST return as filed. Here’s how:
- Go to Filing & Compliance on the left sidebar, and select BC PST Returns.
- In the BC PST Returns page, click the tax return you want to mark as filed.
- In the return detail page, click Mark As Filed.
- In the pop-up, choose the Date of Filing based on your preference.
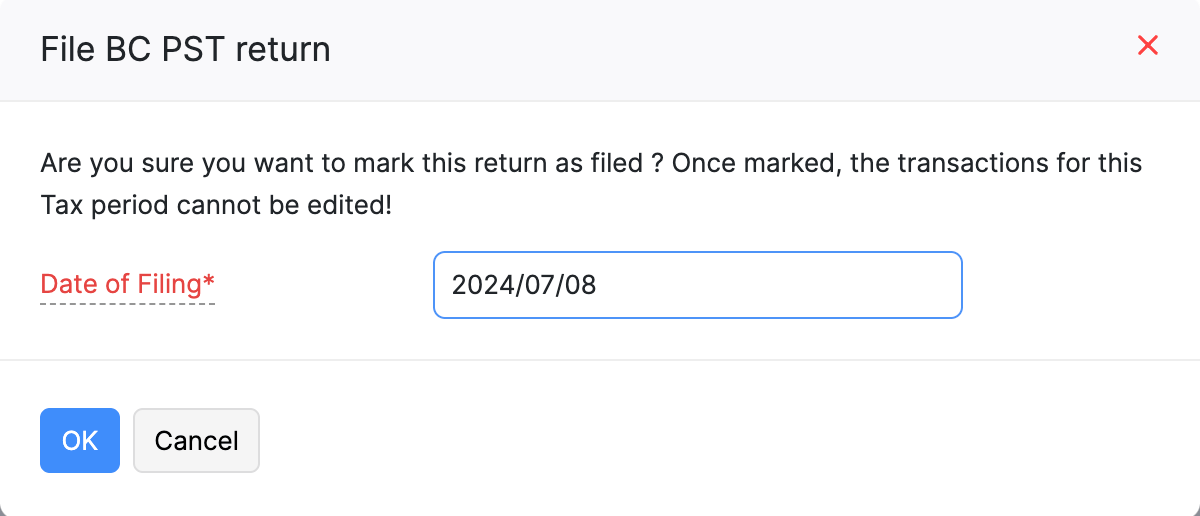
- Click OK to confirm.
Now, the tax return will be marked as filed.
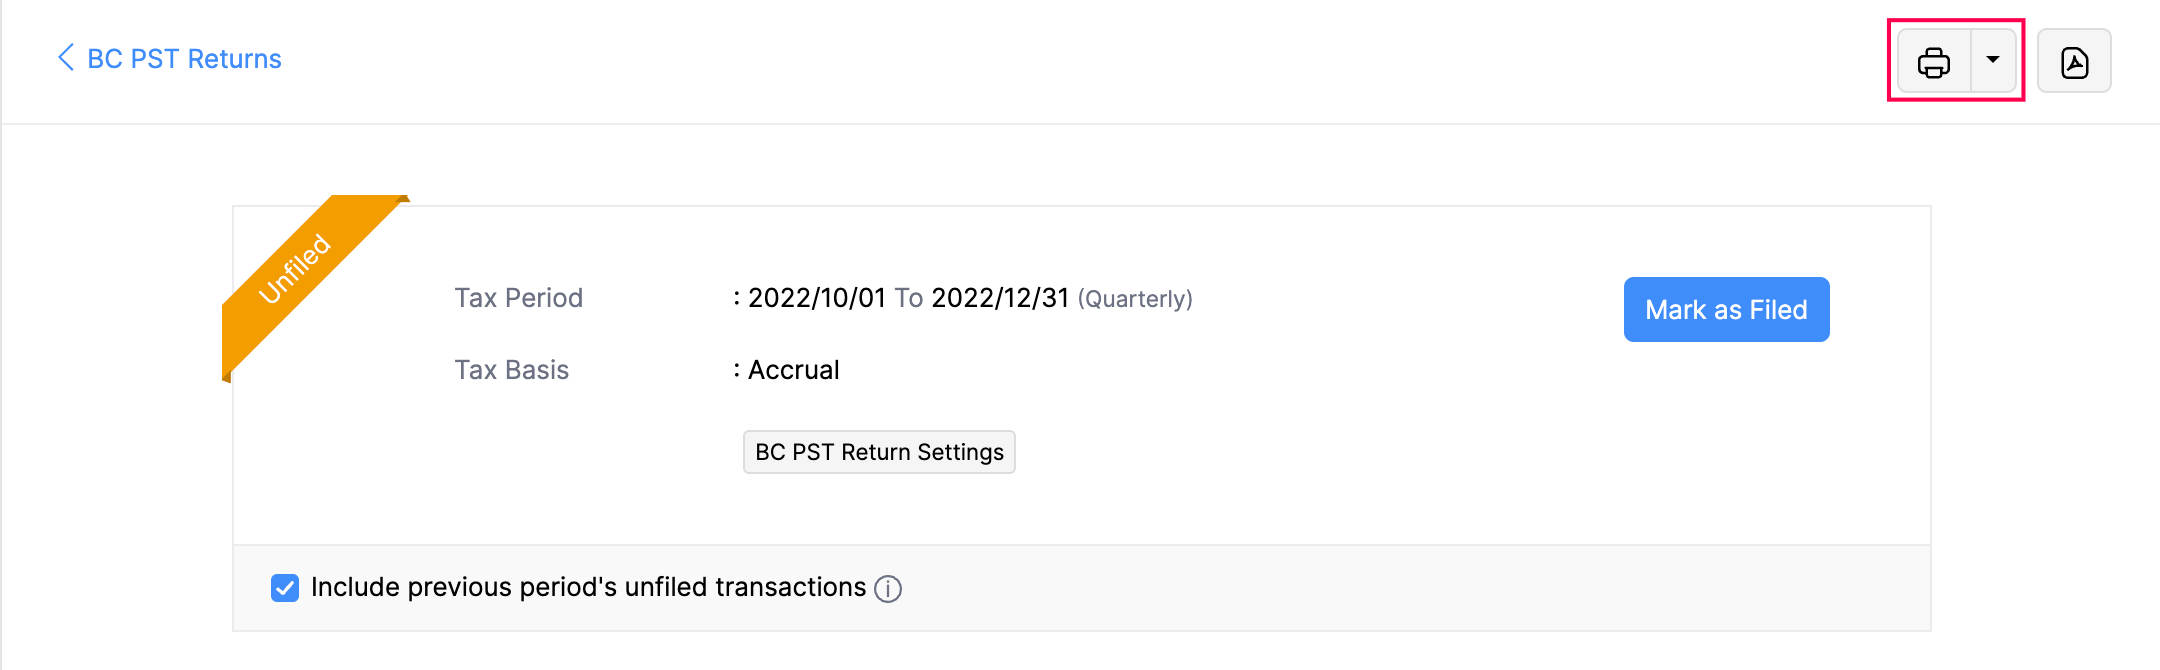
Print Tax Returns
To print tax returns:
- Go to Filing & Compliance on the left sidebar, and select BC PST Returns.
- Select the tax return you want to print.
- Select the Print icon at the top right corner of the page.
- In the Preview pop-up, verify the document, and click Print.
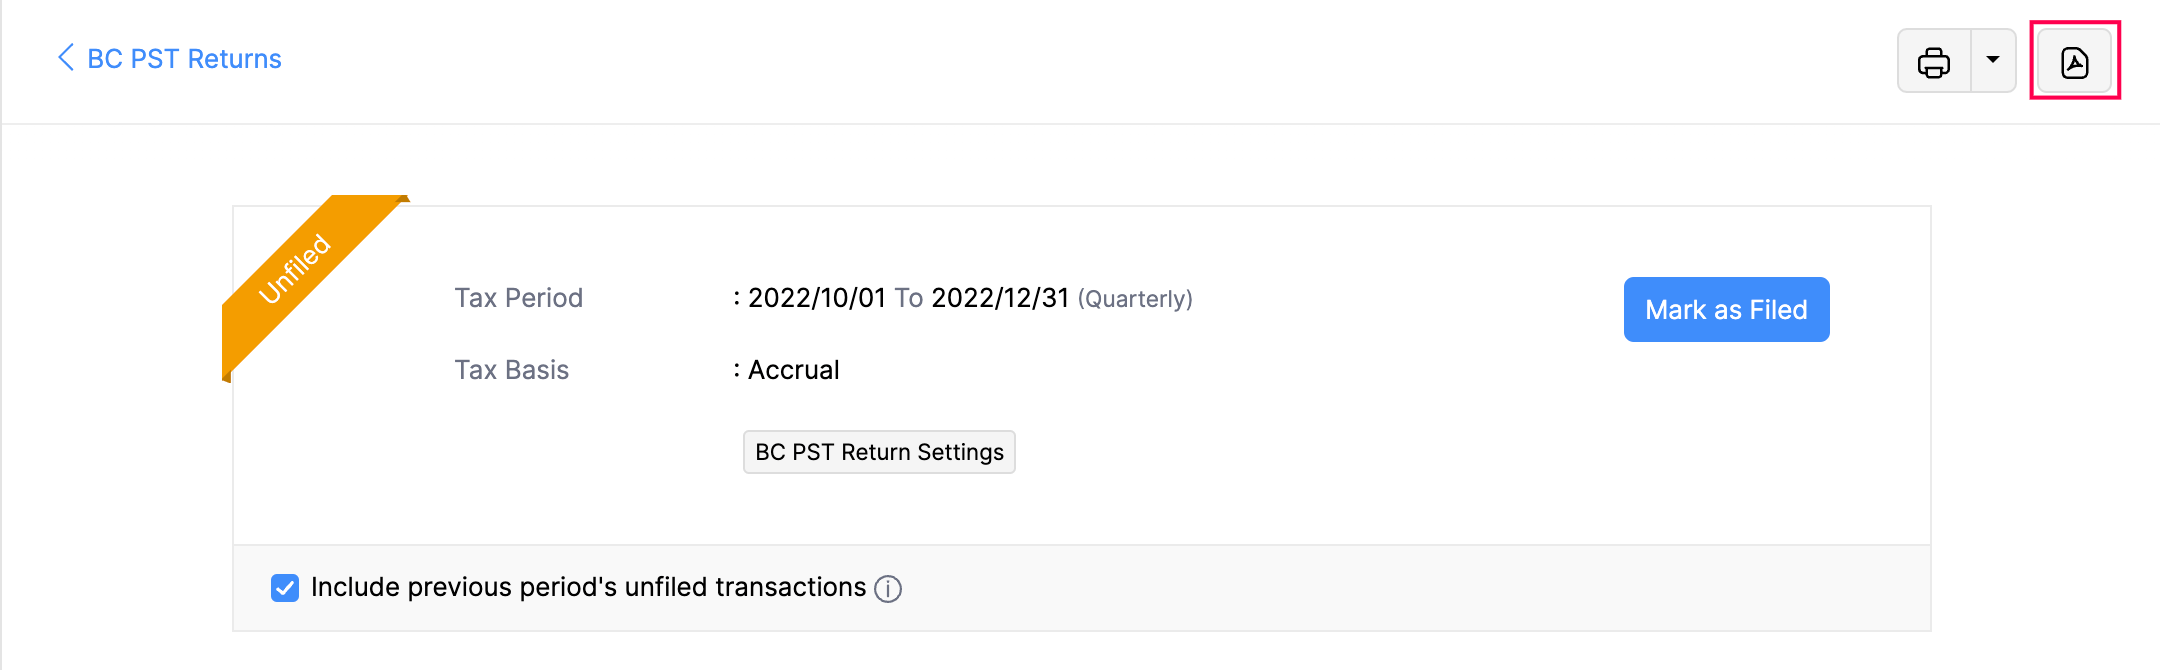
Export Tax Returns
To export a tax return as a PDF:
- Go to Filing & Compliance on the left sidebar, and select BC PST Returns.
- Select the tax return you want to export.
- Click the PDF icon at the top right corner of the page.
- In the Export Report as PDF pop-up:
- If you want to protect the file with a password, check the option I want to protect this file with a password.
- If you want to customize the format of the export, click Customize the details in the export file drop-down and enter the necessary details.
- Click Export.
Record Tax Payments
You can record tax payments in three ways:
Directly from Tax Payments
Prerequisite: Ensure you have a bank account configured in your Zoho Books organization for recording and making payments.
Once you mark your BC PST return as Filed, you can record the payment for the tax. Here’s how:
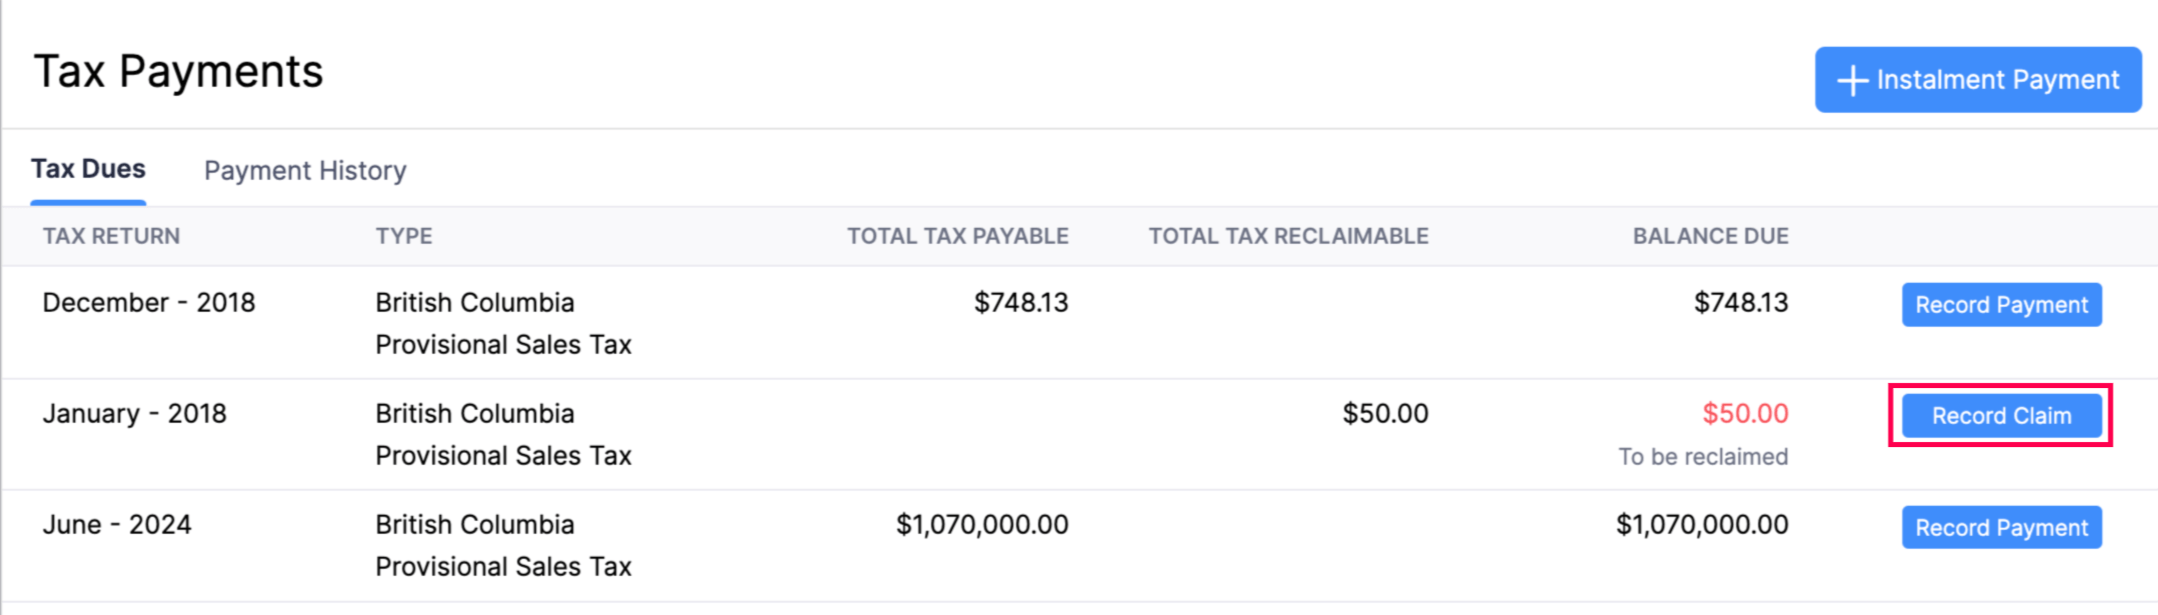
- Go to Filing & Compliance on the left sidebar, and select Tax Payments.
- Under the Tax Dues tab, hover over any of the due taxes, and click Record Payment.

- In the Record Tax Payment pop-up, fill in the following fields:
- Paid Through: Select the bank account you want to use for the tax payment.
- Amount Payable: The full amount is taken by default, but you can modify it as needed.
- Payment Date: The current date is selected by default, but you can modify it as needed.
- Reference Number: Enter a reference number if required.
- Description: Add a description if needed.
- Click Save.
Now, your payment for the due tax will be recorded.
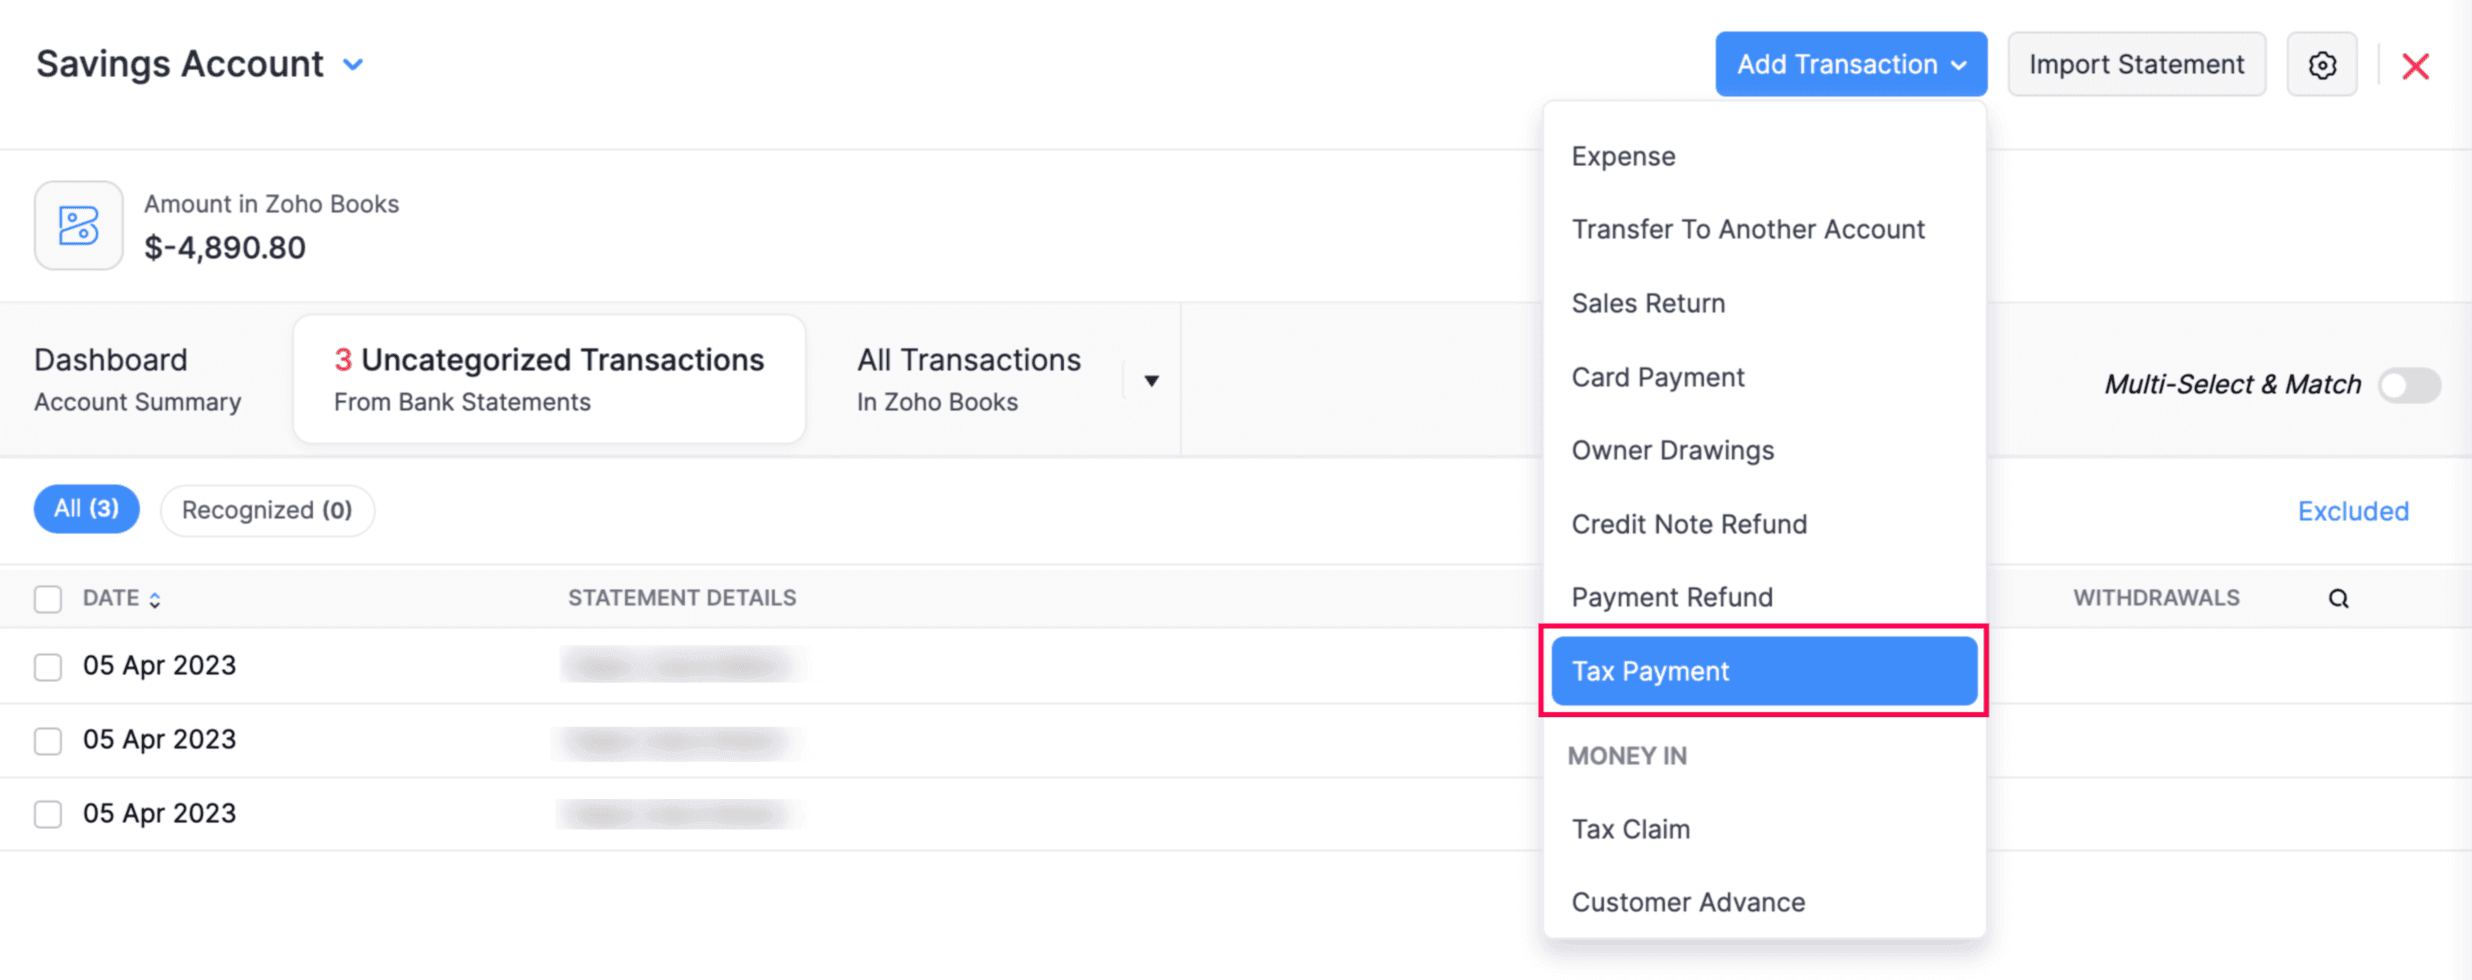
From a Bank Account
To record a tax payment from a bank account:
- Go to Banking on the left sidebar, and select a bank account you want to use for the payment.
- In the following page, click Add Transaction at the top right corner of the page and select Tax Payment from the drop-down.
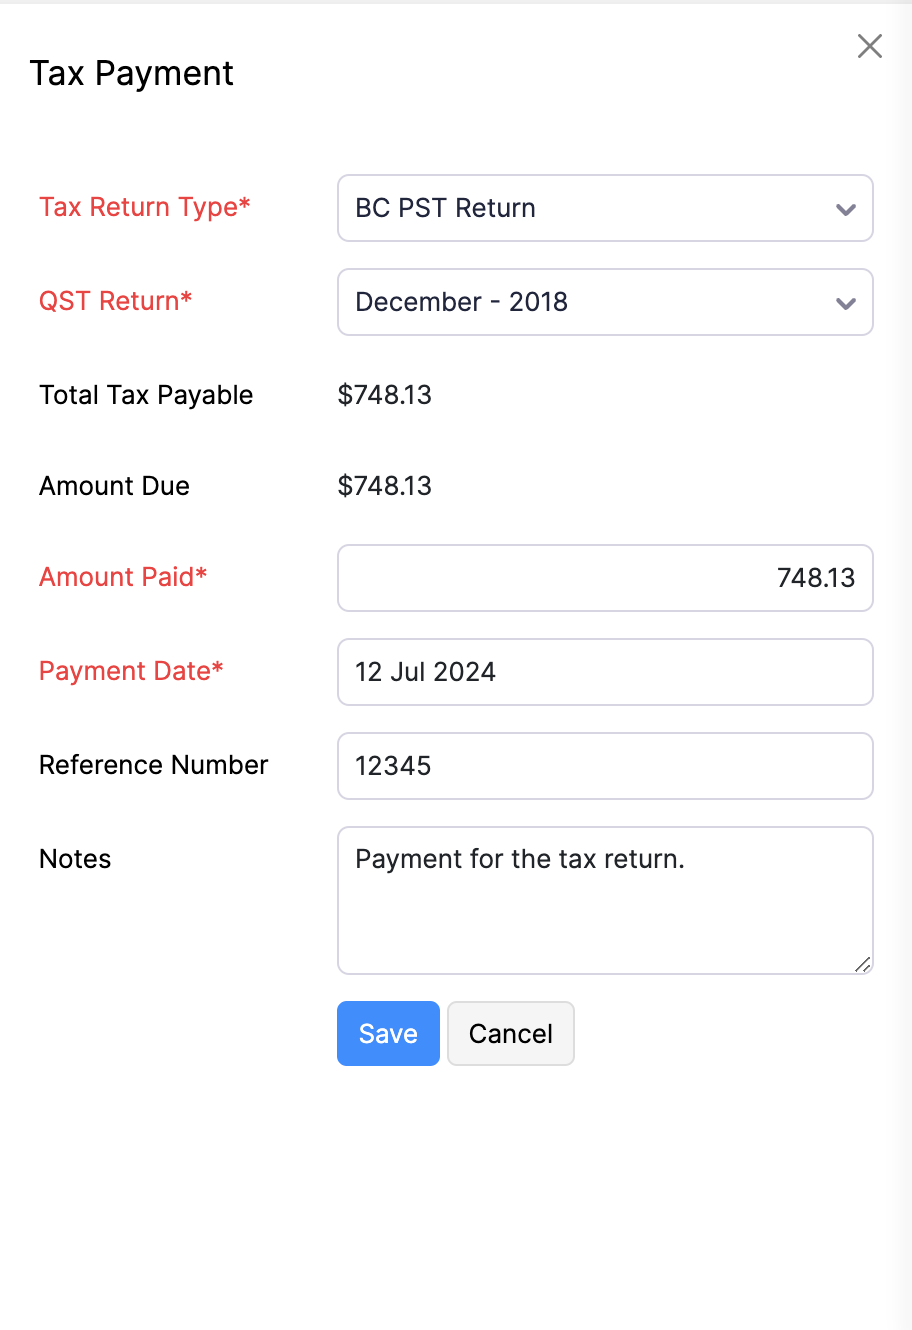
- In the right sidebar that appears, select the Tax Return Type from the dropdown and select the Filing Date from the other dropdown.
- Now, fill in the following fields:
- Amount Paid: This field will be auto-filled with the amount due. Adjust if necessary.
- Payment Date: This field will also be auto-filled with the current date. Change if needed.
- Reference Number: Enter a reference number if needed.
- Notes: Add any relevant notes.
- Click Save.
Now, the payment will be recorded for the tax due from the selected bank account.
By Recording a Claim
In Zoho Books, you can claim a refund or credit for overpaid taxes, tax exemptions, or rebates. Here’s how:
- Go to Filing & Compliance on the left sidebar, and select Tax Payments.
- Under the Tax Dues tab, hover over any of the due taxes, and click Record Claim.
- In the pop-up, fill in the following fields:
- Deposit To: Select the account where the amount will be deposited.
- Payment Date: Choose the payment date.
- Reference Number: Enter a reference number if necessary.
- Description: Add a description if needed.
- Click Save.
Now, your payment for the due tax will be recorded.
Payment History
You can view, edit and delete payments made in the payment history for the BC PST returns you’ve filed.
View Payment History
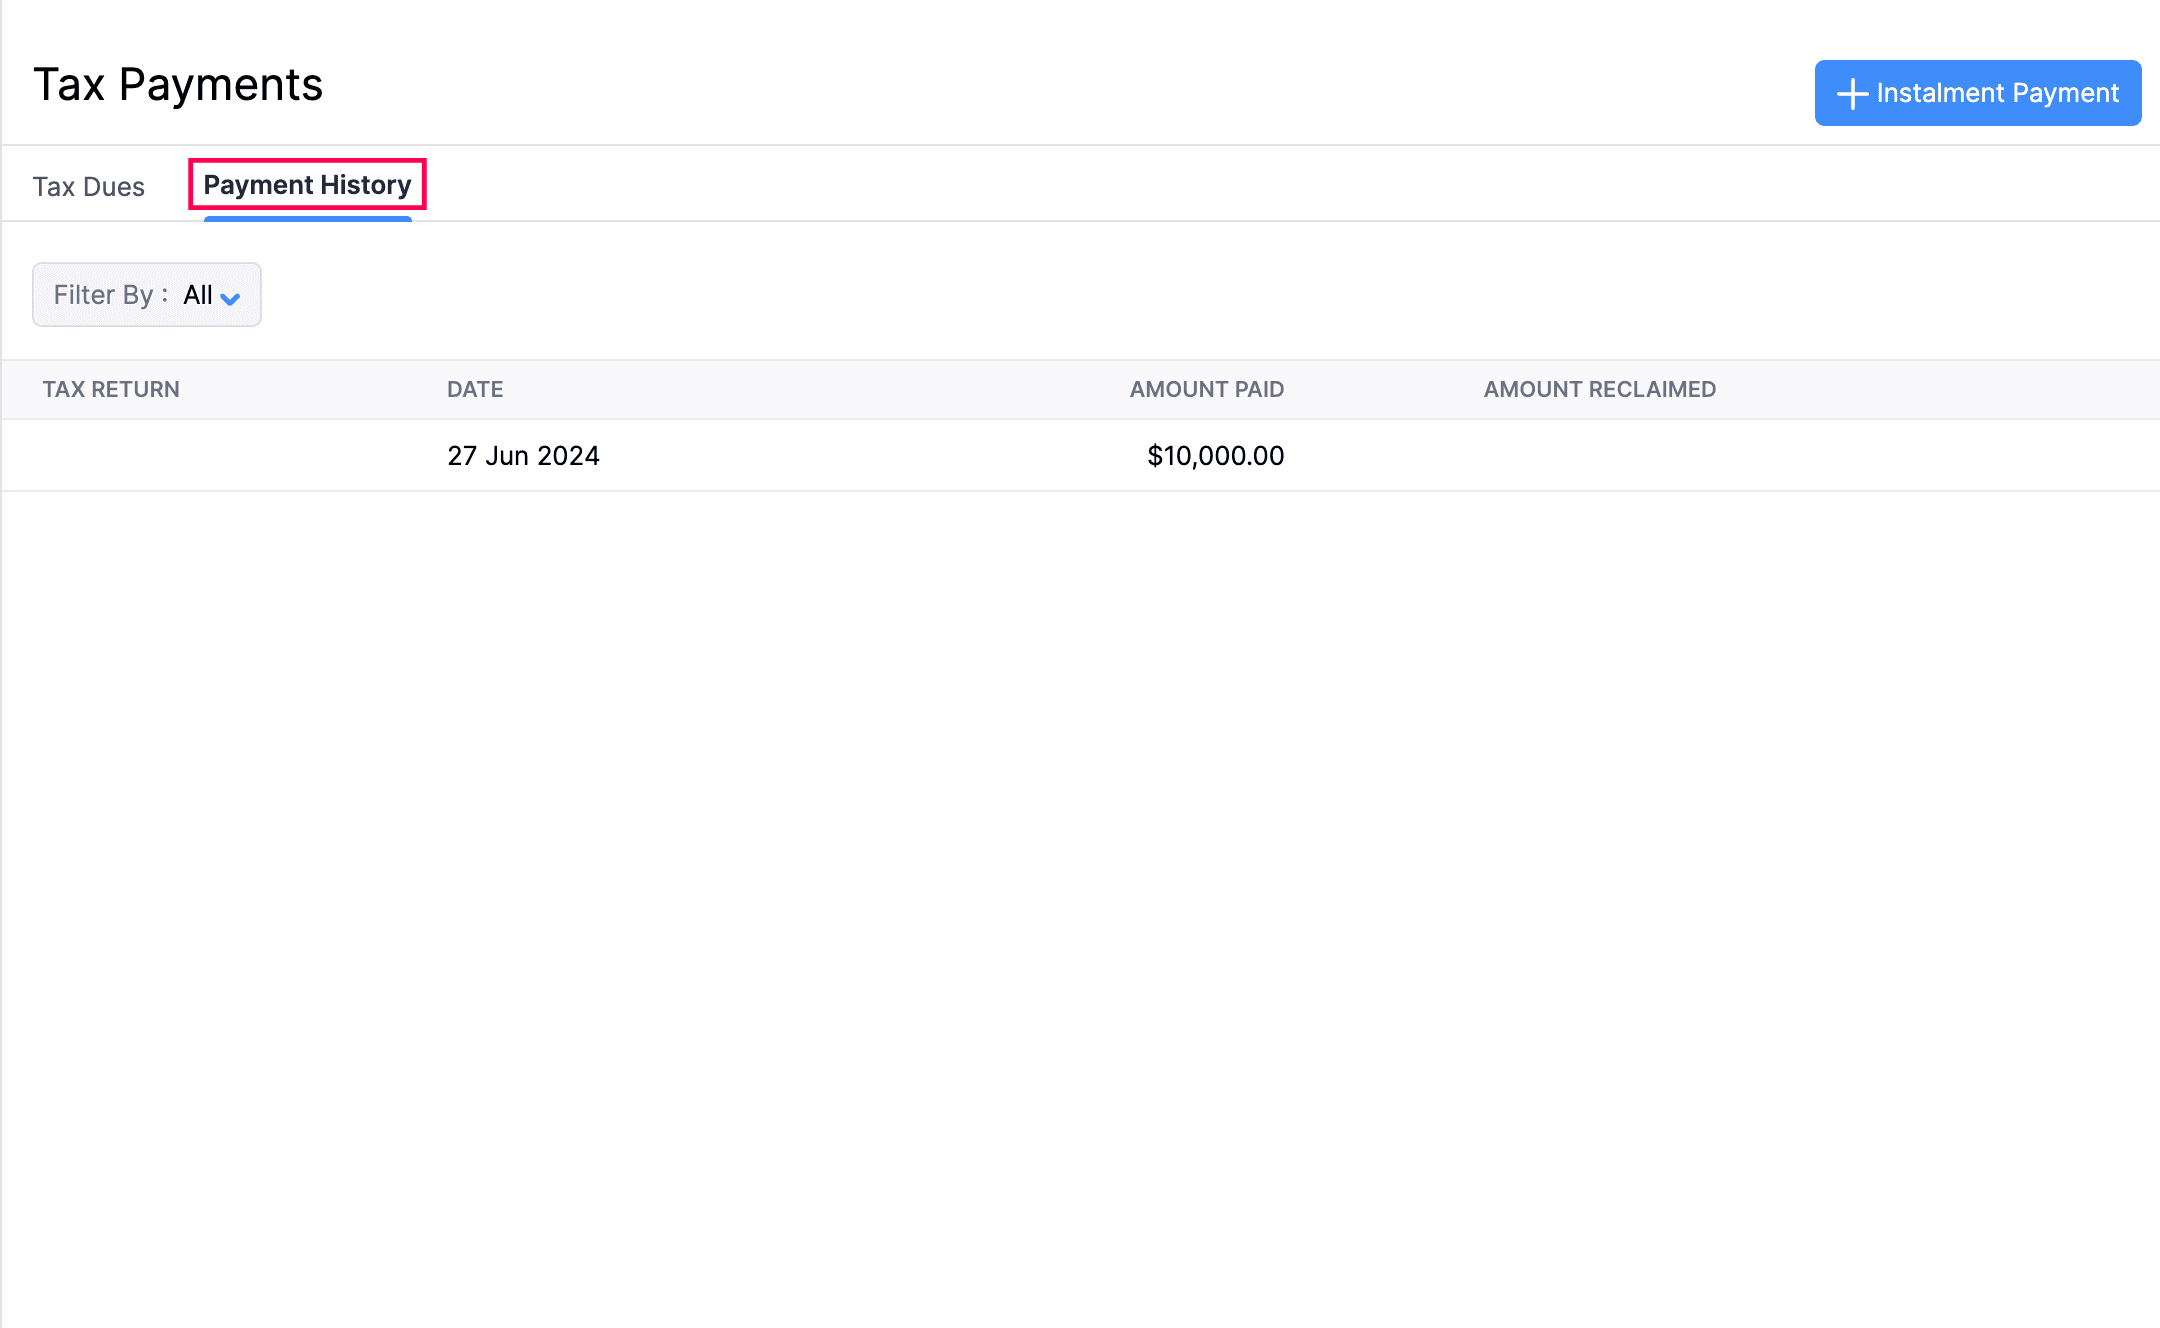
To view payment history:
- Go to Filing & Compliance on the left sidebar, and select Tax Returns.
- Click the Payment History tab at the top of the page.
Now, you can view all the payments made for due taxes.
Edit Payments
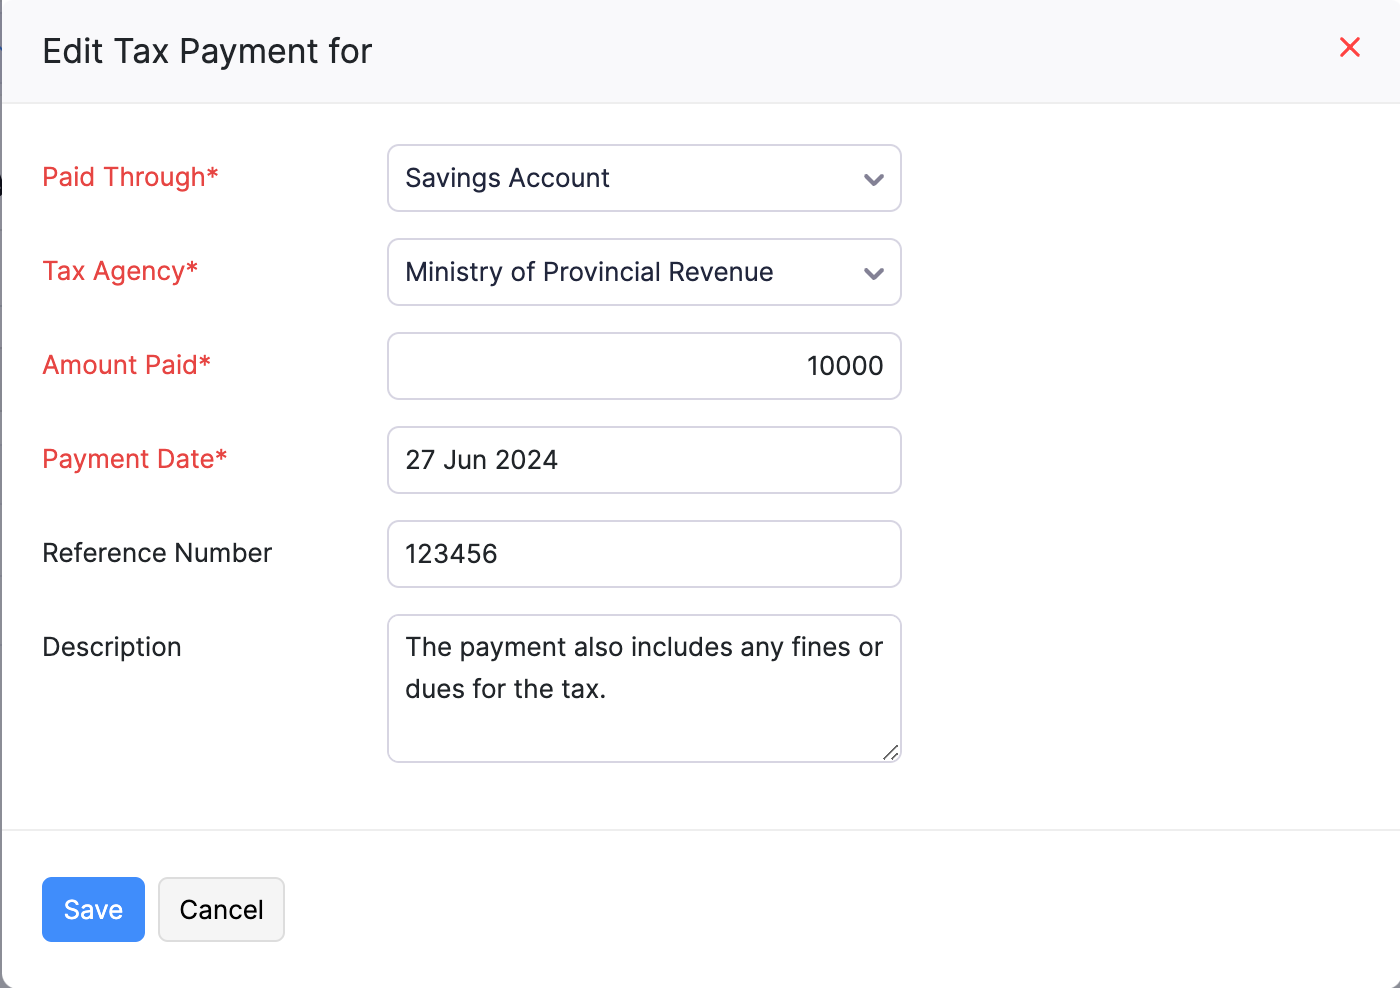
To edit a payment:
- Go to Filing & Compliance on the left sidebar, and select Tax Payments.
- Click the Payment History tab at the top of the page.
- Hover over the payment you want to edit and select it.
- In the pop-up, edit the necessary payment details.
- Click Save.
Delete Recorded Payments
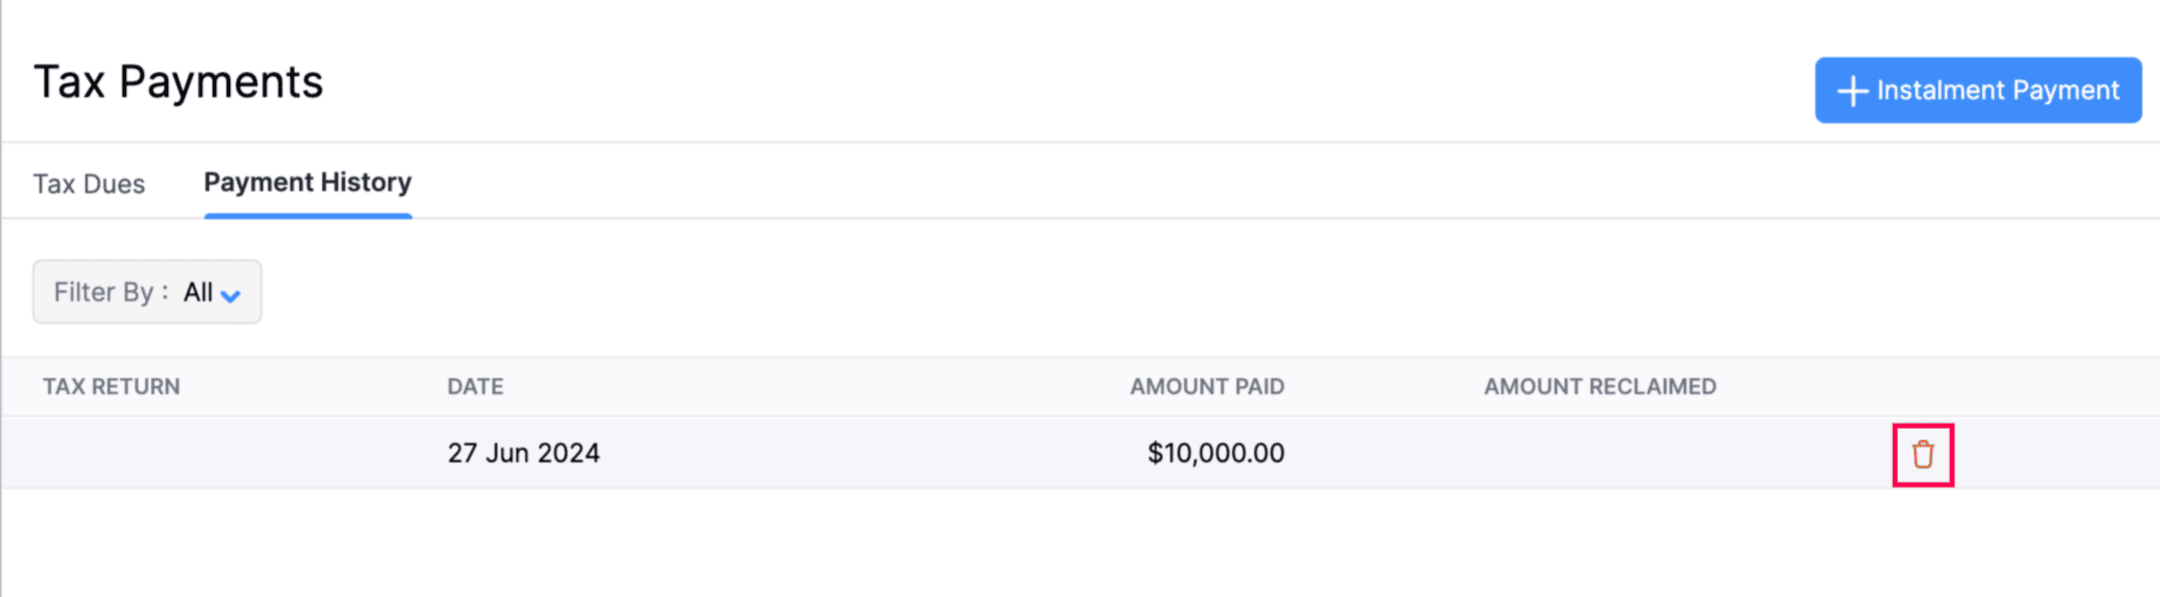
To delete payments:
- Go to Filing & Compliance on the left sidebar, and select Tax Payments.
- Click the Payment History tab at the top of the page.
- Hover over the payment you want to delete and click the Delete icon.
- In the following pop-up, click OK.
Now, the tax payment will be deleted.
 Yes
No
Yes
No
Thank you for your feedback!